VirtualGlobalPhone - FreePBX configuration
Step 1 ADD VirtualGlobalPhone SIP TRUNK
Follow steps below to add SIP Trunk:
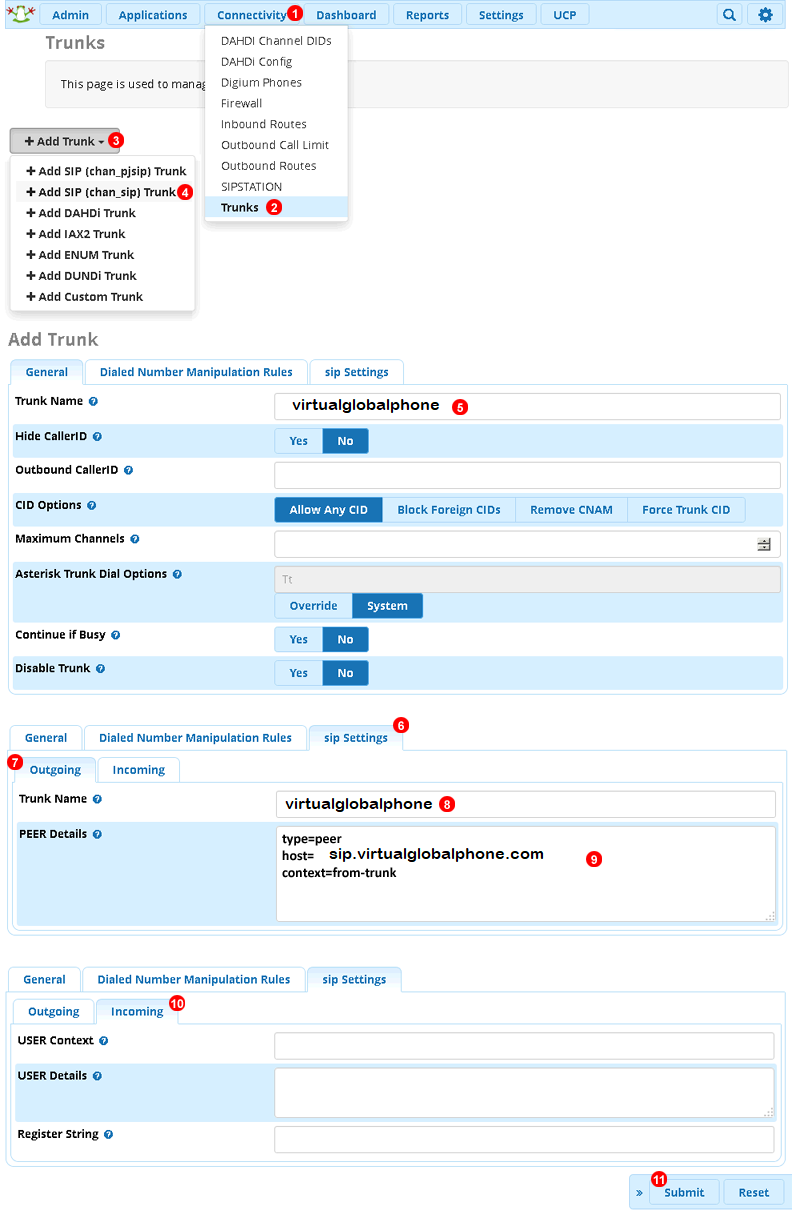
- Click Connectivity menu.
- Select Trunks.
- Click Add Trunk button.
- Select `Add SIP (chan_sip) Trunk
- Enter name of the trunk as VirtualGlobalPhone
- Switch to sip Settings tab.
- Switch to Outgoing panel.
- Enter VirtualGlobalPhone as Trunk Name.
- Enter the following into PEER Details field : sip.virtualglobalphone.com
- Switch to Incoming tab.
- Enter the following into Register String:
sipusername:sippassword@sip.virtualglobalphone.com
PEER DETAILS will contain the below.
type=peer
host=sip.virtualglobalphone.com
context=from-trunk
qualify=yes
defaultuser=sip_username ; <- replace with your Outbound SIP Username [ You would have recevied in the email which contains your phone number ]
remotesecret=sip_password ; <- replace with your Outbound SIP Password

Step 2 Routing configuration [Outbound route]
Follow steps below to add Outbound route:
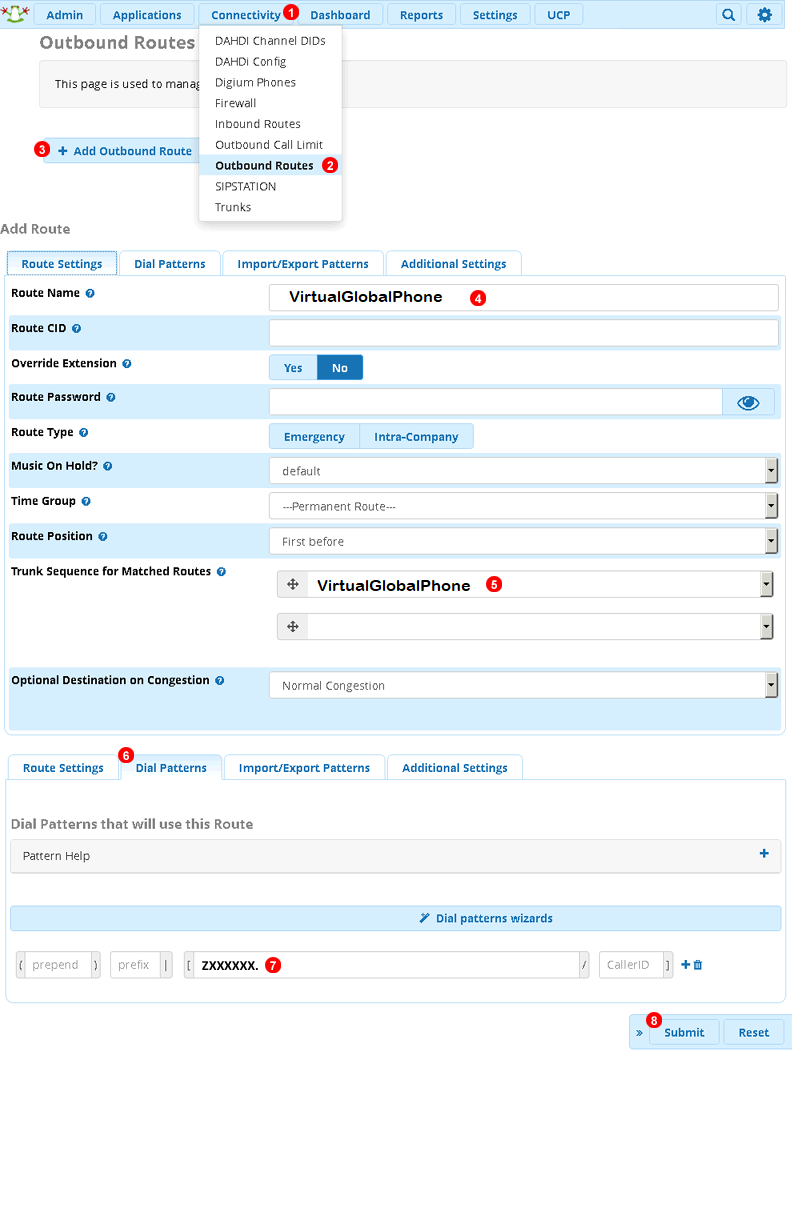
- Click Connectivity.
- Select Outbound Routes.
- Click Add Outbound Route button.
- Enter VirtualGlobalPhone as Route Name
- Select VirtualGlobalPhone in Trunk Sequence for Matched Routes drop down list.
- Switch to Dial Patterns tab.
- Enter ZXXXXXX. to send numbers longer than 7 digits to VIrtualGlobalPhone service.
- Click Submit button.

Step 3 Routing configuration [INBOUND route]
For each of the Telephone Numbers on your VirtualGlobalPhone account follow steps below to add Inbound route:
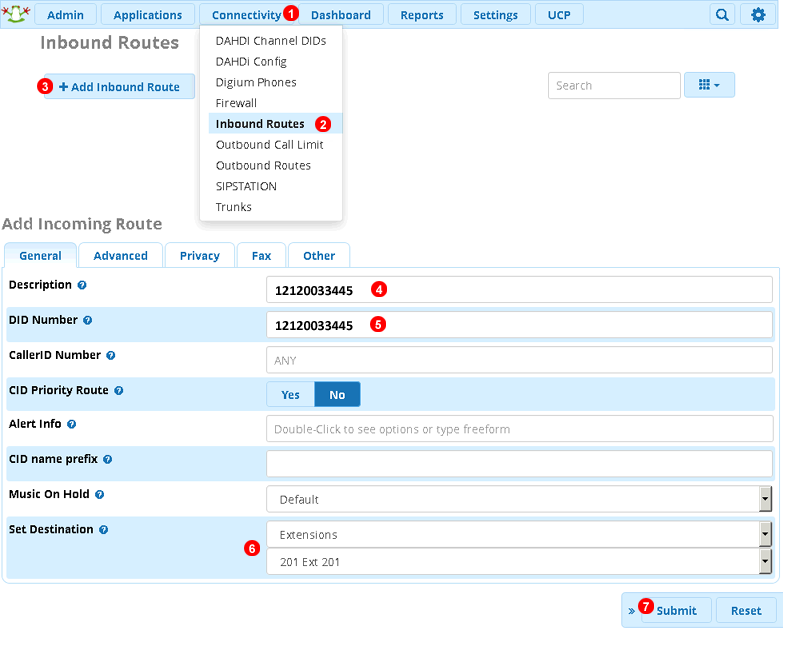
- Click Connectivity.
- Select Inbound Routes.
- Click Add Inbound Route button.
- Enter Telephone Number into Description field.
- Enter Telephone Number into DID Number field.
- Set desired destination from the drop down list.
- Click Submit button.
Note: make sure to click Apply Config button in top right corner of the page to reload your FreePBX configuration.

